


Move Embroidery Files to an Embroidery Machine: Easy Guide
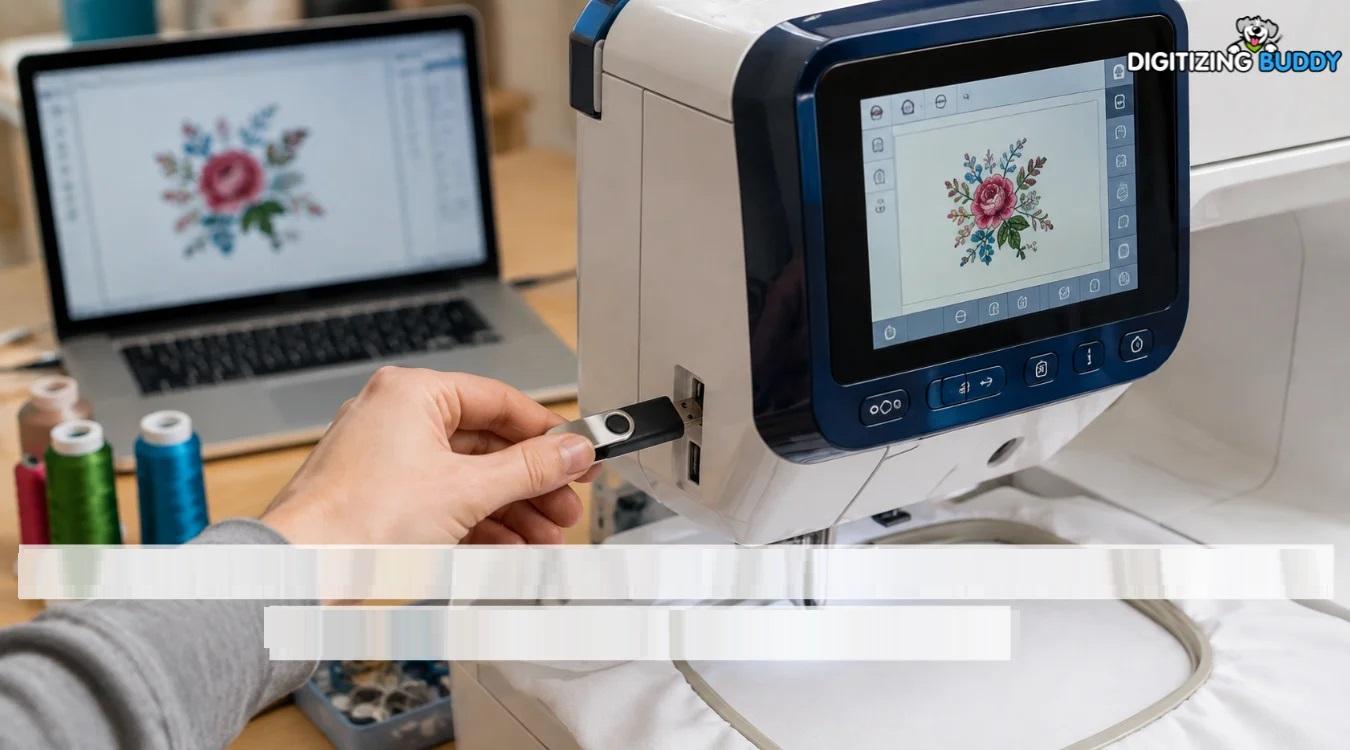
Move Embroidery Files to an Embroidery Machine
You have a beautiful embroidery design ready to stitch, but there is one step left: getting the design onto your embroidery machine. For beginners, this can feel more confusing than creating the design itself. The good news is that learning how to move embroidery files to an embroidery machine is usually quick once you understand the basic process.
Whether your design is stored on a computer, USB drive, or another device, the main goal is the same: transfer a machine-readable embroidery file and make sure the machine can recognize it correctly. In this guide, we will explain the process step by step, along with common mistakes, file-format tips, and practical troubleshooting advice.
What Does It Mean to Move Embroidery Files to an Embroidery Machine?
Moving embroidery files means transferring a digital embroidery design from one storage device to your embroidery machine. The machine then reads the file and uses its stitch instructions to create the design on fabric.
Unlike a regular image such as JPG or PNG, an embroidery file contains information the machine needs, including:
- Stitch locations
- Stitch sequence
- Thread color information
- Design dimensions
- Needle changes
- Jump stitches
- Trim commands, when supported
This is why you cannot simply copy an ordinary picture and expect the machine to stitch it. The artwork needs to be digitized into a compatible embroidery format first.
Check the Embroidery File Format First
Before you move embroidery files to an embroidery machine, check which file format your machine supports.
Different embroidery machines can require different formats. Common machine embroidery file types include:
- PES
- DST
- JEF
- EXP
- VP3
- HUS
- XXX
- VIP
The correct format depends on your specific machine. A design saved in the wrong format may not appear on the machine at all, or it may load incorrectly.
Why File Compatibility Matters
Think of an embroidery file like a language. Your machine needs to understand that language before it can follow the stitching instructions.
If your machine requires a particular format, convert or save the design in that format before transferring it. If you are unsure, check your machine's user manual for the supported file extensions.
How to Move Embroidery Files to an Embroidery Machine
There are several ways to transfer embroidery designs. The most common options are USB drives, direct computer connections, memory cards on compatible equipment, and wireless transfers on machines that support them.
Method 1: Use a USB Flash Drive
A USB flash drive is one of the simplest ways to transfer an embroidery design.
Follow these steps:
- Insert the USB drive into your computer.
- Locate the finished embroidery file.
- Make sure it is saved in a supported format.
- Copy the file to the USB drive.
- Safely eject the USB drive from your computer.
- Insert the USB drive into the embroidery machine.
- Turn on the machine if required.
- Open the design or USB menu.
- Select your embroidery file.
- Confirm the design and prepare it for stitching.
This method works well when you regularly download or create designs on a computer and then transfer them to your machine.
Method 2: Transfer Directly From a Computer
Some embroidery machines support a direct connection to a computer.
If your machine supports this method, connect it using the appropriate cable and install any required software or drivers. Open the embroidery design on your computer, select the machine or transfer option, and follow the software instructions.
The exact process can vary, so always follow the instructions provided for your machine.
Method 3: Use Wireless Transfer
Newer embroidery equipment may offer wireless connectivity. If your machine supports wireless design transfer, you may be able to send embroidery files without using a physical USB drive.
The general process is:
- Connect the machine to the appropriate wireless network.
- Open the supported embroidery software or transfer application.
- Select your digitized design.
- Choose the connected embroidery machine.
- Send the file.
- Confirm that the design appears on the machine's display.
Wireless transfer can save time when you frequently create and test new embroidery designs.
Prepare Your Design Before Transferring It
Simply knowing how to move embroidery files to an embroidery machine is not enough. You should also check the design before sending it to the machine.
Open the design in compatible embroidery software and review its:
- Size
- Stitch count
- Thread colors
- Stitch order
- Underlay
- Density
- Number of color changes
- Overall shape
A design may look perfect on your computer but still require adjustments before stitching.
Check the Design Size
Always confirm that the embroidery design fits within your machine's embroidery area.
For example, a large back design may not fit in a small hoop. If you transfer an oversized file, the machine may reject it or prevent you from positioning it correctly.
Resizing a digitized design too much can also cause stitching problems. It is usually better to resize within reasonable limits or have the design properly adjusted for the new dimensions.
Organize Your Embroidery Files
A little organization can make the transfer process much easier.
Instead of keeping hundreds of designs in one folder, create folders based on project type. For example:
- Logos
- Names and lettering
- Patches
- Hats
- Shirts
- Monograms
- Finished designs
- Designs to test
Use clear file names as well. A name such as company-logo-left-chest is much easier to recognize than design123finalnew.pes.
Good file organization becomes especially useful when several designs are stored on the same USB drive.
What If the Machine Does Not Recognize the File?
Sometimes you successfully move embroidery files to an embroidery machine, but the design does not appear. Don't panic. This is a common problem and is often easy to solve.
Check the File Extension
First, confirm that the file uses a format supported by your machine.
For example, if your machine only reads a particular embroidery format, another extension may not show up in its design menu.
Check the USB Drive
The machine may have limitations regarding USB storage devices or file organization.
Try these steps:
- Remove unnecessary files from the USB drive.
- Place the embroidery design in the main directory.
- Rename the file using a simple name.
- Safely eject and reconnect the drive.
- Restart the embroidery machine if necessary.
If the machine still cannot read the file, consult its manual for supported storage requirements.
Check the Design Itself
A damaged or incorrectly exported embroidery file may also cause problems.
Open the design in compatible embroidery software and confirm that it loads correctly. If possible, use the software's machine-specific export option before transferring it again.
Why a Design Can Stitch Poorly After Transfer
Getting the file onto your machine is only one part of successful embroidery. A design can transfer correctly and still produce poor results.
Common causes include:
- Incorrect stitch density
- Poor underlay settings
- Too many stitches in a small area
- Incorrect pull compensation
- Improper stitch direction
- Fabric movement
- Incorrect stabilizer
- Unsuitable thread or needle
- Design scaled beyond its intended size
For example, small lettering requires careful digitizing. If the stitches are too dense, the letters can become difficult to read after stitching.
This is why professional embroidery digitizing focuses on how a design will actually sew, not just how it looks on screen.
Test the Design Before the Final Project
One of the smartest habits for embroidery beginners is testing a design before stitching it on an expensive garment.
Use a similar fabric and stabilizer whenever possible. Stitch a sample and look for:
- Thread breaks
- Gaps
- Fabric puckering
- Uneven outlines
- Poor lettering
- Excessive thread buildup
- Incorrect color changes
A test sew gives you a chance to correct problems before they affect the final product.
Tips for Moving Embroidery Designs Successfully
Keep these practical tips in mind whenever you transfer a design:
1. Always Confirm the Format
Do not assume that every embroidery file works with every machine. Verify compatibility first.
2. Keep a Backup
Save your original design on your computer or cloud storage before transferring it. If the file becomes corrupted or accidentally deleted, you will still have the original.
3. Use Simple File Names
Avoid unnecessarily long file names or unusual characters if your machine has limited file-name support.
4. Don't Overfill the USB Drive
Keeping only the designs you need on the USB drive makes it easier to find the correct file.
5. Match the Hoop Size
Check your selected hoop before sending the design. A design that exceeds the embroidery area may not work correctly.
6. Preview Before Stitching
If your machine offers a design preview, use it. Check the placement, size, and color sequence before pressing start.
7. Keep the Machine's Manual Nearby
Your machine's manual is the best source for its specific file formats, USB requirements, hoop sizes, and transfer procedures.
Can You Move a JPG or PNG Directly to an Embroidery Machine?
Usually, no.
JPG, PNG, and similar image files contain pixels rather than stitch instructions. An embroidery machine generally needs a digitized embroidery file that tells it exactly where, how, and in what order to place stitches.
The basic workflow is:
Artwork → Embroidery digitizing → Machine-compatible file → Transfer → Test stitch
This distinction is important when learning how to move embroidery files to an embroidery machine. If you only have artwork, the first step is to convert or digitize it into a suitable embroidery format.
What If You Need a Logo Digitized?
Business logos often contain small text, detailed shapes, gradients, or fine lines that do not automatically translate into good embroidery.
Professional digitizing can convert artwork into stitches while considering fabric type, design size, stitch density, underlay, and thread behavior.
At Digitizing Buddy, the focus is on creating embroidery-ready designs that are prepared for practical stitching rather than simply converting an image into a file extension.
Common Mistakes Beginners Should Avoid
Even a simple transfer can go wrong when a few basic steps are skipped.
Avoid these mistakes:
- Copying an unsupported file format
- Forgetting to check the hoop size
- Stitching without previewing the design
- Using a badly digitized image
- Resizing a design excessively
- Removing the USB drive while files are transferring
- Skipping a test stitch
- Keeping confusing duplicate files on the USB drive
Taking an extra minute to check the file can save you from wasting thread, fabric, and time.
A Simple Workflow for Beginners
If you are new to machine embroidery, use this straightforward workflow:
Step 1: Create or Download the Design
Start with a finished embroidery design or artwork that needs digitizing.
Step 2: Choose the Correct Machine Format
Find out which file type your embroidery machine supports.
Step 3: Check the Design
Confirm the dimensions, hoop compatibility, stitch quality, and color sequence.
Step 4: Transfer the File
Use USB, direct computer transfer, wireless transfer, or another method supported by your equipment.
Step 5: Preview the Design
Open the design on the machine and check its size and placement.
Step 6: Test Stitch
Use a suitable piece of fabric and stabilizer before moving to your final garment.
Step 7: Stitch the Final Project
Once everything looks right, hoop your final material and begin embroidery.
Frequently Asked Questions
How do I transfer an embroidery file to my machine?
The easiest method is often a USB flash drive. Copy the compatible embroidery file to the drive, insert it into the machine, open the USB or design menu, and select the file.
What file format does an embroidery machine need?
It depends on the machine. Different equipment supports different embroidery formats, so check your machine's manual before transferring a design.
Can I transfer a JPG directly to an embroidery machine?
Generally, no. A JPG is an image file rather than a stitch file. It usually needs to be digitized into a compatible machine embroidery format first.
Why is my embroidery file not showing on the machine?
The most common reasons are an unsupported file format, incorrect USB setup, incompatible file naming, or a damaged embroidery file. Check each of these before transferring again.
Should I test an embroidery design before using it?
Yes. A test stitch can reveal problems with density, lettering, underlay, fabric stability, and thread tension before they affect your final garment.
Conclusion
Learning to move embroidery files to an embroidery machine is much easier when you break the process into simple steps. Start by checking the machine's supported file format, prepare the design correctly, transfer it using a compatible method, preview it, and always consider a test stitch before working on the final piece.
The transfer itself may only take a few minutes, but good preparation can make a major difference in embroidery quality. Whether you are stitching a personal monogram, a custom patch, or a business logo, the right machine-ready file is the foundation for a clean and professional result.
With a little practice, transferring embroidery designs will become a normal part of your embroidery workflow rather than a frustrating technical step.

 English
 Arabic
 French
 Spanish
 Portuguese
 Deutsch
 Turkish
 Italiano
 Russian
 Romaian
 Portuguese (Brazil)
 Greek